Quail eggs, with their charming speckled shells and rich, delicate flavor, are a delightful addition to any meal, from gourmet salads to simple snacks. However, their diminutive size can make cooking them precisely a bit of a challenge with traditional methods. Enter the electric egg cooker – a seemingly simple appliance that can revolutionize how you prepare these tiny treasures. This guide will walk you through everything you need to know to achieve perfectly cooked quail eggs, every single time, right in your standard electric egg cooker.
What is an Electric Egg Cooker? Why Use It for Quail Eggs?
An electric egg cooker is a compact kitchen appliance designed to streamline the egg-cooking process, typically using steam. It automates much of the guesswork associated with boiling eggs on a stovetop. These devices usually feature a heating plate, a water measuring cup, an egg tray, and a lid, often with an automatic shut-off function.
For quail eggs, an electric egg cooker offers distinct advantages. Its controlled steaming environment provides consistent heat, which is crucial for eggs as small and delicate as quail eggs. This precision minimizes the risk of overcooking, which can lead to rubbery whites and mealy yolks. The built-in water measurements, even if calibrated for larger chicken eggs, give you a reliable starting point for adjusting to quail eggs, ensuring repeatable results. It’s also incredibly convenient, allowing you to set it and forget it while your tiny eggs cook to perfection.
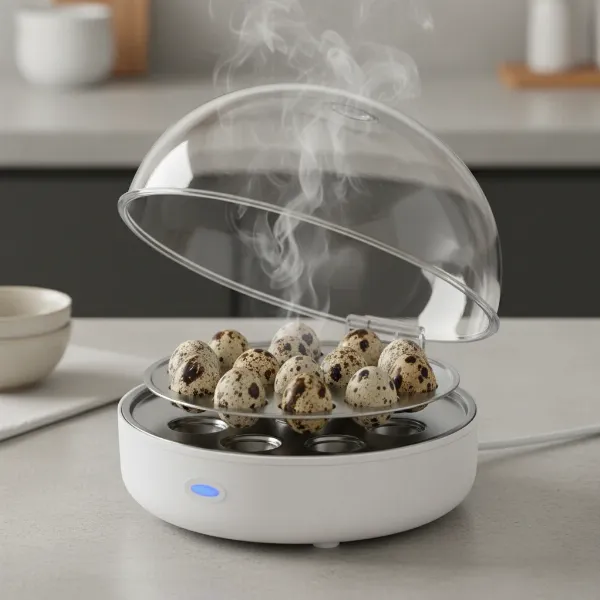 Electric egg cooker with quail eggs being steamed, illustrating ease of use.
Understanding Quail Eggs: Small Size, Big Flavor
Quail eggs are roughly one-fifth the size of a standard chicken egg, weighing between 8 to 15 grams each. They boast a distinctly creamy, richer yolk-to-white ratio, contributing to their luxurious taste. Their shells are thinner and more fragile, often beautifully speckled, which requires gentle handling. Nutritionally, quail eggs are packed with vitamins and minerals, offering a concentrated burst of goodness in a tiny package. Due to their size, about 3-4 quail eggs are generally considered equivalent to one chicken egg.
Preparing Your Quail Eggs for the Electric Cooker
Proper preparation is the first step to culinary success with quail eggs.
Selection and Handling
|
Our Picks for the Best Egg cooker in 2026
As an Amazon Associate I earn from qualifying purchases.
|
||
| Num | Product | Action |
|---|---|---|
| 1 | Rapid Egg Cooker, 12 Egg Capacity Electric Egg Cooker for Hard Boiled Eggs, Soft, Medium, Poached Eggs, Food & Vegetable Steamer for Breakfast, One-Touch Button, Over-Heat Protect, BPA-Free |

|
| 2 | DASH Rapid Egg Cooker: 7 Egg Capacity Electric Egg Cooker for Hard Boiled Eggs, Poached Eggs, Scrambled Eggs, or Omelets. |
|
| 3 | Elite Gourmet EGC-007## Rapid Egg Cooker, 7 Easy-To-Peel, Hard, Medium, Soft Boiled Eggs, Poacher, Omelet Maker, Auto Shut-Off, Alarm, 16-Recipe Booklet, White |
|
| 4 | Dash Rapid Egg Cooker - Boiler, Poacher & Steamer - Includes Measuring & Recipe Guide - Dishwasher Safe - Holds 7 Eggs, Aqua |
|
| 5 | Evoloop Rapid Egg Cooker Electric 6 Eggs Capacity, Soft, Medium, Hard Boiled, Poacher, Omelet Maker Egg Poacher With Auto Shut-Off, BPA Free |
|
| 6 | Elite Gourmet EGC322CBL Easy Egg Cooker Electric 7-Egg Capacity, Soft, Medium, Hard-Boiled Egg Cooker with Auto Shut-Off, Measuring Cup Included, BPA Free, Classic Blue |
|
| 7 | Elite Gourmet EGC115M Easy Egg Cooker Electric 7-Egg Capacity, Soft, Medium, Hard-Boiled Egg Cooker with Auto Shut-Off, Measuring Cup Included, BPA Free, Retro Mint |
|
| 8 | DASH Electric Rapid Egg Cooker for Hard Boiled/Poached/Scrambled Eggs or Omelets with Auto Shut-Off Feature, Black, 7 Egg Capacity |
|
| 9 | Elite Gourmet EGC115B Easy Egg Cooker Electric 7-Egg Capacity, Soft, Medium, Hard-Boiled Egg Cooker with Auto Shut-Off, Measuring Cup Included, BPA Free, Classic Black |
|
| 10 | Mojoco Rapid Egg Cooker - Mini Egg Cooker for Steamed, Hard Boiled, Soft Boiled Eggs and Onsen Tamago - Electric Egg Boiler for Home Kitchen, Dorm Use - Smart Egg Maker with Auto Shut OFF and Alarm |
|
Always start with fresh, high-quality quail eggs. When handling them, be mindful of their delicate shells. Avoid dropping them or knocking them together, as they can crack much more easily than chicken eggs. Gently transfer them from their carton to your workspace.
The Piercing Advantage
Many electric egg cookers come with a small pin to pierce the large end of eggs. This step is particularly beneficial for quail eggs. Piercing a tiny hole in the egg shell before cooking helps prevent cracking during the steaming process by allowing steam to escape. It also aids in easier peeling later on. Carefully use the provided pin to make a small puncture on the wider end of each quail egg.
Water Levels: A Critical Adjustment
This is where adapting your standard electric egg cooker for quail eggs is key. Since quail eggs are significantly smaller and cook faster than chicken eggs, they require less water than what the measuring cup indicates for chicken eggs to achieve the same level of doneness.
For hard-boiled quail eggs, a good starting point is to use the water measurement typically recommended for “soft-boiled” chicken eggs. This amount of water, when steamed, provides just enough heat and time to hard-boil the smaller quail eggs without overcooking. You might need to experiment slightly with your specific model to find the perfect balance.
Step-by-Step Guide: Cooking Quail Eggs in Your Electric Cooker
Follow these simple steps for perfectly cooked quail eggs:
- Prepare the Eggs: Gently wash your quail eggs. Using the piercing tool on your egg cooker’s measuring cup, carefully pierce a small hole in the larger end of each egg.
- Add Water to the Base: Measure cold water according to your desired doneness. As a general guide, use the water amount typically designated for soft-boiled chicken eggs to achieve hard-boiled quail eggs. For softer quail eggs, you will use even less water. Pour this water onto the heating plate of your electric egg cooker.
- Place Eggs in the Tray: Carefully place the pierced quail eggs onto the egg tray, ensuring the pierced end faces upwards. Arrange them so they don’t touch each other too much, if possible.
- Cover and Cook: Place the lid securely on the cooker and turn it on. The cooker will use steam to cook the eggs and will usually shut off automatically once the water has evaporated.
- Immediate Ice Bath: As soon as the cooker shuts off, carefully remove the eggs from the tray and immediately plunge them into a bowl of ice water. This crucial step stops the cooking process, prevents a green ring around the yolk, and significantly aids in easier peeling. Allow them to cool in the ice bath for at least 5-10 minutes.
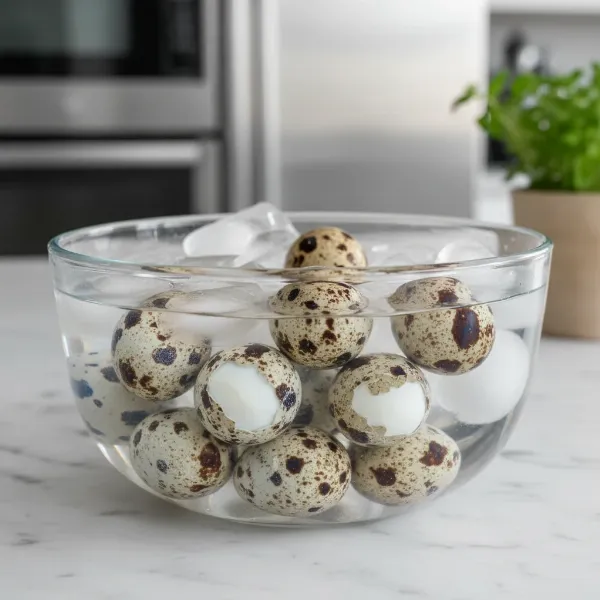 Perfectly cooked hard-boiled quail eggs resting in a bowl of ice water for easy peeling.
Achieving Perfect Doneness: Timing is Everything
While electric egg cookers often rely on water volume to dictate cooking time, understanding general durations for different doneness levels can help you fine-tune your approach.
| Desired Doneness | Approximate Water Level (using chicken egg measure as reference) | Quail Egg Cook Time (Estimate) | Visual Result |
|---|---|---|---|
| Soft-Boiled | Below “soft” line (e.g., half of soft-boil water) | 3-4 minutes | Set whites, runny, creamy yolk |
| Medium-Boiled | Around “soft” line | 4-5 minutes | Mostly set whites, jammy, slightly soft yolk |
| Hard-Boiled | Around “medium” to “hard” line (or the “soft” line for chicken eggs) | 6-7 minutes | Fully set whites and yolks |
Experimentation with your specific egg cooker model is recommended to find your ideal settings.
The Art of Peeling Quail Eggs: Tips for Frustration-Free Results
Peeling quail eggs can be notoriously tricky due to their thin shells and the membrane that often stubbornly clings to the egg white. However, with the right technique, it becomes much easier.
“The secret to easy-peel quail eggs lies not just in the cooking process, but in the rapid cooling and a gentle touch during the peeling phase. An immediate ice bath is your best friend.” – Admin, eggcookersreview.com
Here are the best strategies:
- Ice Bath is Non-Negotiable: As mentioned, an immediate and thorough ice bath is the most critical step. The rapid cooling helps the egg white contract, separating it from the shell membrane.
- Gentle Rolling and Cracking: After cooling, remove one egg at a time from the ice water. Gently roll it on a hard surface (like a countertop) with light pressure to create many tiny cracks all over the shell. The goal is to shatter the shell into small pieces without crushing the egg inside.
- Peeling Under Water: Submerge the cracked egg in a bowl of cold water while you peel. The water helps to loosen the membrane and allows the shell fragments to float away, making the process smoother.
- Start at the Air Pocket: Begin peeling from the wider end of the egg where the air pocket is located. This area often provides a slightly easier starting point to get under the membrane. Pinch through the membrane here and gently peel it away with the shell.
- Use Slightly Older Eggs: Eggs that are a few days or a week old tend to peel more easily than very fresh ones. As eggs age, the pH level changes, and the air pocket expands, making the membrane less adherent to the white.
Troubleshooting Common Issues
Even with an electric cooker, you might encounter a few minor hurdles.
- Cracked Shells: If eggs crack during cooking, ensure you’ve pierced them correctly. Also, avoid overcrowding the tray, and make sure your eggs are at room temperature, or at least not ice-cold, before cooking, as extreme temperature changes can cause cracking.
- Difficulty Peeling: Revisit the ice bath step. Ensure the eggs are thoroughly chilled. You can also try adding a pinch of baking soda to the cooking water, which some believe aids in easier peeling.
- Overcooked/Undercooked: Adjust the water level slightly for your next batch. Remember, less water means a softer boil for quail eggs, and more water means a harder boil.
Maintaining Your Electric Egg Cooker
Keeping your electric egg cooker clean ensures its longevity and consistent performance.
After each use, allow the heating plate to cool completely. Wipe the heating plate with a damp cloth to remove any mineral deposits (which can accumulate from water, especially hard water). The egg tray and lid can typically be washed with warm, soapy water or placed in the dishwasher if they are dishwasher-safe. Always ensure all parts are dry before reassembling and storing your cooker.
Conclusion
Cooking quail eggs in a standard electric cooker transforms what can be a finicky task into an effortless routine. By understanding the unique characteristics of quail eggs and making slight adjustments to water levels and techniques, you can consistently achieve perfectly cooked, easy-to-peel results. The convenience and precision of an electric egg cooker make it an indispensable tool for anyone who loves these tiny, flavorful eggs. So, go ahead, experiment with your cooker, and elevate your culinary creations with perfectly boiled quail eggs.
What delicious dishes will you create with your perfectly cooked quail eggs?
Frequently Asked Questions
How many quail eggs are equivalent to one chicken egg?
Generally, three to five quail eggs are equivalent to one standard large chicken egg, depending on the size of the quail eggs and the specific recipe.
Can I cook frozen quail eggs in an electric cooker?
It is not recommended to cook quail eggs directly from frozen in an electric egg cooker. Thaw them in the refrigerator overnight or under cold running water before cooking to ensure even results and prevent cracking.
What’s the best way to store cooked quail eggs?
Cooked quail eggs, still in their shells, can be stored in an airtight container in the refrigerator for up to one week. Once peeled, they should be eaten within 2-3 days for optimal freshness and taste.