Are you tired of the breakfast roulette, where every attempt at boiling eggs feels like a gamble? Whether you dream of a perfectly runny yolk for your toast or a firm, sliceable hard-boiled egg for salads, achieving that ideal consistency can be surprisingly tricky. The good news? Your egg cooker is designed to take the guesswork out of this daily ritual. This comprehensive guide will transform you into an egg-spert, showing you precisely how to use your appliance to consistently create hard-boiled and soft-boiled eggs that are nothing short of perfection. Say goodbye to rubbery whites or undercooked yolks and hello to effortless egg preparation.
Understanding Your Egg Cooker: Beyond the Basics
An egg cooker is a simple yet revolutionary kitchen appliance that uses steam to cook eggs. Unlike traditional stovetop boiling, where eggs are submerged in bubbling water, an egg cooker requires only a small, measured amount of water to generate a consistent steam environment. This controlled method ensures even cooking, minimizes cracking, and often results in shells that are remarkably easier to peel. The magic lies in this precise steam control, making it a favorite for those seeking consistent results without constant monitoring.
The core of an egg cooker’s operation revolves around its heating plate and a specialized measuring cup. The amount of water you add dictates the cooking time; once the water completely evaporates, the heating cycle usually concludes, often with an audible alert. Many models come with markings on their measuring cups specifically for different egg consistencies—soft, medium, and hard—and sometimes even for the number of eggs being cooked.
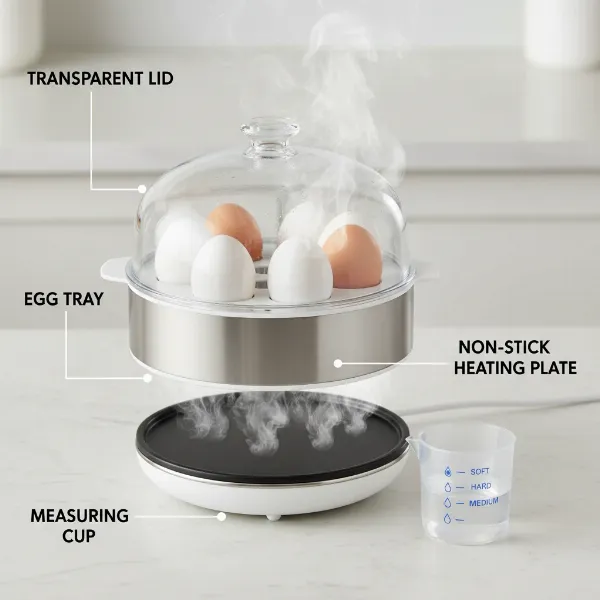 Diagram showing an egg cooker with its heating plate, measuring cup, and lid for steaming eggs.
The Art of Soft Boiling in an Egg Cooker
A truly perfect soft-boiled egg boasts a delicate, set white and a warm, liquid or “jammy” yolk that oozes beautifully. It’s ideal for dipping toast “soldiers,” enhancing avocado toast, or adding richness to a bowl of ramen. Achieving this delicate balance with an egg cooker is surprisingly straightforward.
To make soft-boiled eggs:
- Prepare the Eggs: Begin with cold eggs directly from the refrigerator. Most egg cookers come with a piercing pin located on the bottom of the measuring cup. Gently pierce the larger end of each egg. This small hole helps prevent cracking during the steaming process by allowing air to escape.
- Measure Water: Fill your egg cooker’s measuring cup to the designated “soft” line. This line indicates the precise amount of water needed to create enough steam for the desired consistency.
- Arrange and Cook: Place the pierced eggs in the egg tray, with the pierced side facing upwards. Position the tray over the heating plate, cover with the lid, and turn on the cooker.
- Cool Immediately: Once the cooker signals completion (usually with a beep), immediately transfer the eggs to an ice bath or rinse them under cold running water. This crucial step halts the cooking process, ensuring the yolk remains delightfully runny and makes peeling much easier.
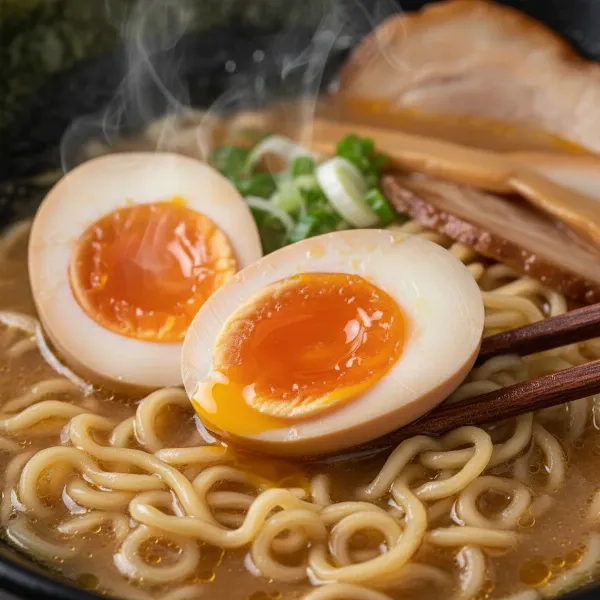 A perfectly soft-boiled egg with a runny yolk, sliced in half, served with ramen noodles.
Mastering Hard-Boiled Eggs with Your Appliance
For a hard-boiled egg, you’re aiming for a firm, fully set white and a creamy, uniformly cooked yellow yolk—without any dreaded gray-green ring. These versatile eggs are staples for salads, sandwiches, deviled eggs, or simply as a protein-packed snack. Your egg cooker makes achieving this consistency foolproof.
To make hard-boiled eggs:
- Prepare the Eggs: As with soft-boiled eggs, use cold eggs from the refrigerator and gently pierce the larger end of each egg with the provided pin to prevent cracking.
- Measure Water: Fill the measuring cup to the “hard” line. This larger volume of water will generate steam for a longer duration, ensuring the eggs cook thoroughly.
- Arrange and Cook: Place the pierced eggs on the tray, pierced-side up, cover, and start the cooker.
- Cool Promptly: When the cooker beeps, remove the eggs immediately and plunge them into an ice bath for at least 5-10 minutes. This quick cooling prevents overcooking (which causes the green ring and rubbery texture) and significantly aids in peeling.
“The secret to perfectly cooked eggs in an egg cooker isn’t just about time; it’s about the precise amount of water. That little measuring cup is your most valuable tool.” – eggcookersreview.com Admin, Egg Cooker Specialist
Fine-Tuning Your Results: Factors and Troubleshooting
While egg cookers offer remarkable consistency, a few variables can influence the final result. Understanding these can help you fine-tune your technique for absolute perfection.
- Egg Size: Most egg cooker guides are calibrated for large eggs. If you’re using extra-large, jumbo, or smaller eggs, you may need to slightly adjust the water amount or cooking time. Larger eggs might require a touch more water or an extra minute or two (if your cooker allows manual timing adjustments).
- Initial Egg Temperature: While some traditional boiling methods advocate for room-temperature eggs, most egg cooker manufacturers and users find that starting with cold, refrigerated eggs yields the most consistent results in a steam environment.
- Altitude: At higher altitudes, water boils at a lower temperature, which means steam is slightly less hot. This can prolong cooking times. If you live at a high elevation and your eggs are consistently undercooked, try adding a tiny bit more water than the specified line.
- Experimentation: Every egg cooker model can behave slightly differently, and personal preference for “soft” or “hard” varies. Don’t be afraid to experiment with slight adjustments to the water level (a millimeter more or less) until you find your absolute sweet spot.
Troubleshooting Common Issues:
- Eggs too soft: You might need slightly more water in the measuring cup. Ensure the lid is properly sealed and that you’re removing the eggs promptly after the beep.
- Eggs too hard/rubbery/green ring: You likely used too much water or didn’t cool them fast enough. Reduce the water slightly for future batches and always use an ice bath immediately.
Quick Reference: Egg Cooker Timing Guide Table
This general guide provides a starting point for achieving various egg consistencies using a typical steam egg cooker. Always refer to your specific model’s instructions, as water measurements can vary.
| Egg Doneness | Yolk Consistency | White Consistency | Water Level (Measuring Cup) | Post-Cook Action | Notes |
|---|---|---|---|---|---|
| Soft-Boiled | Runny to Jammy | Set, Tender | “Soft” Line | Immediate Ice Bath (2-3 min) | Perfect for toast, dipping, or ramen toppings. |
| Medium-Boiled | Creamy, Barely Set | Firm, Tender | “Medium” Line | Immediate Ice Bath (3-5 min) | Great for salads, curries, or a balanced snack. |
| Hard-Boiled | Firm, Fully Cooked | Firm, Solid | “Hard” Line | Immediate Ice Bath (5-10 min) | Ideal for meal prep, deviled eggs, or sandwiches. |
Note: The actual “timing” for egg cookers is usually controlled by the amount of water evaporating, rather than a manual timer you set for X minutes. The lines on your measuring cup account for this.
Conclusion
The journey to perfect hard-boiled or soft-boiled eggs doesn’t have to be a daunting one. With your egg cooker and this simple timing guide, you’re equipped to consistently achieve your desired egg consistency with minimal effort and maximum reliability. By understanding the role of water measurement, practicing the piercing and ice bath techniques, and making minor adjustments for your specific appliance and preferences, you’ll unlock a world of culinary convenience.
So, what egg masterpiece will you create for your next meal?
Frequently Asked Questions
How do egg cookers work differently from boiling eggs on the stove?
|
Our Picks for the Best Egg cooker in 2026
As an Amazon Associate I earn from qualifying purchases.
|
||
| Num | Product | Action |
|---|---|---|
| 1 | Elite Gourmet EGC115M Easy Egg Cooker Electric 7-Egg Capacity, Soft, Medium, Hard-Boiled Egg Cooker with Auto Shut-Off, Measuring Cup Included, BPA Free, Retro Mint |

|
| 2 | Dash Rapid Egg Cooker - Boiler, Poacher & Steamer - Includes Measuring & Recipe Guide - Dishwasher Safe - Holds 7 Eggs, Aqua |
|
| 3 | Elite Gourmet EGC115B Easy Egg Cooker Electric 7-Egg Capacity, Soft, Medium, Hard-Boiled Egg Cooker with Auto Shut-Off, Measuring Cup Included, BPA Free, Classic Black |
|
| 4 | DASH Electric Rapid Egg Cooker for Hard Boiled/Poached/Scrambled Eggs or Omelets with Auto Shut-Off Feature, Black, 7 Egg Capacity |
|
| 5 | Mojoco Rapid Egg Cooker - Mini Egg Cooker for Steamed, Hard Boiled, Soft Boiled Eggs and Onsen Tamago - Electric Egg Boiler for Home Kitchen, Dorm Use - Smart Egg Maker with Auto Shut OFF and Alarm |
|
| 6 | Evoloop Rapid Egg Cooker Electric 6 Eggs Capacity, Soft, Medium, Hard Boiled, Poacher, Omelet Maker Egg Poacher With Auto Shut-Off, BPA Free |
|
| 7 | Elite Gourmet EGC-007## Rapid Egg Cooker, 7 Easy-To-Peel, Hard, Medium, Soft Boiled Eggs, Poacher, Omelet Maker, Auto Shut-Off, Alarm, 16-Recipe Booklet, White |
|
| 8 | Rapid Egg Cooker, 12 Egg Capacity Electric Egg Cooker for Hard Boiled Eggs, Soft, Medium, Poached Eggs, Food & Vegetable Steamer for Breakfast, One-Touch Button, Over-Heat Protect, BPA-Free |
|
| 9 | DASH Rapid Egg Cooker: 7 Egg Capacity Electric Egg Cooker for Hard Boiled Eggs, Poached Eggs, Scrambled Eggs, or Omelets. |
|
| 10 | Elite Gourmet EGC322CBL Easy Egg Cooker Electric 7-Egg Capacity, Soft, Medium, Hard-Boiled Egg Cooker with Auto Shut-Off, Measuring Cup Included, BPA Free, Classic Blue |
|
Egg cookers primarily use steam generated from a measured amount of water to cook eggs gently and evenly. This method provides more consistent heat and typically results in eggs that are easier to peel compared to submerging them in boiling water on a stovetop, where temperatures can fluctuate and shells are more prone to cracking.
Can I use my egg cooker for different egg sizes?
While most egg cookers are calibrated for large eggs, you can often use different sizes. For extra-large eggs, you might need to add a touch more water (a millimeter or two above the recommended line). For smaller eggs, slightly less water could be used. Experimentation is key to finding the perfect balance for your preferred egg size and consistency.
Why do some egg cooker instructions recommend piercing the eggs?
Piercing the larger end of the egg with a small pin helps prevent the eggshell from cracking during the cooking process. This is because it allows trapped air inside the egg to escape as the egg heats and expands, reducing pressure buildup within the shell. It also contributes to easier peeling after cooking.
How do I prevent a green ring around hard-boiled egg yolks?
A green ring around the yolk indicates overcooking, caused by a reaction between sulfur in the egg white and iron in the yolk. To prevent this, ensure you use the correct amount of water for hard-boiled eggs (as per your cooker’s measuring cup) and, most importantly, immediately transfer the cooked eggs to an ice bath after the cooker signals completion. This rapidly stops the cooking process.
Is it better to use cold or room-temperature eggs in an egg cooker?
For optimal and consistent results in an egg cooker, it is generally recommended to start with cold eggs directly from the refrigerator. While traditional stovetop methods sometimes suggest room temperature eggs, the steam environment of an egg cooker is designed to handle cold eggs efficiently, minimizing variables and promoting even cooking.