Few kitchen tasks are as universally frustrating as peeling a hard-boiled egg. You start with good intentions, hoping for that smooth, pristine oval, but too often end up with a mangled, pockmarked mess, losing precious bits of white along with the stubborn shell. If you’ve ever found yourself battling a clingy shell, wondering if perfectly peeled eggs are just a myth, you’re in the right place. As a technician with over a decade of experience in egg cookers, from the most basic models to high-tech wonders, I’ve seen every trick and technique. This guide will share the foolproof methods that guarantee perfectly peeled hard-boiled eggs, every single time.
The Science Behind the Struggle: Why Eggs Stick
The primary culprit behind difficult-to-peel hard-boiled eggs is often freshness. Very fresh eggs have a lower pH level, causing the albumen (egg white) to strongly adhere to the inner membrane of the shell. As an egg ages, its pH naturally increases, making the membrane less sticky and creating a tiny air pocket at the larger end of the egg, which helps the shell separate more easily. This difference in adhesion is why farm-fresh eggs, while delicious, are notoriously harder to peel than those that have been sitting in your refrigerator for a week or more. Understanding this fundamental principle is the first step toward achieving peeling perfection.
Pre-Boil Perfection: Setting Your Eggs Up for Success
Success in peeling actually begins before the eggs even hit the water. A few simple considerations can dramatically improve your chances of a flawless peel.
Age Matters: The Secret to Easy Peeling
|
Our Picks for the Best Egg cooker in 2026
As an Amazon Associate I earn from qualifying purchases.
|
||
| Num | Product | Action |
|---|---|---|
| 1 | DASH Electric Rapid Egg Cooker for Hard Boiled/Poached/Scrambled Eggs or Omelets with Auto Shut-Off Feature, Black, 7 Egg Capacity |

|
| 2 | Evoloop Rapid Egg Cooker Electric 6 Eggs Capacity, Soft, Medium, Hard Boiled, Poacher, Omelet Maker Egg Poacher With Auto Shut-Off, BPA Free |
|
| 3 | Elite Gourmet EGC322CBL Easy Egg Cooker Electric 7-Egg Capacity, Soft, Medium, Hard-Boiled Egg Cooker with Auto Shut-Off, Measuring Cup Included, BPA Free, Classic Blue |
|
| 4 | Elite Gourmet EGC115M Easy Egg Cooker Electric 7-Egg Capacity, Soft, Medium, Hard-Boiled Egg Cooker with Auto Shut-Off, Measuring Cup Included, BPA Free, Retro Mint |
|
| 5 | Dash Rapid Egg Cooker - Boiler, Poacher & Steamer - Includes Measuring & Recipe Guide - Dishwasher Safe - Holds 7 Eggs, Aqua |
|
| 6 | DASH Rapid Egg Cooker: 7 Egg Capacity Electric Egg Cooker for Hard Boiled Eggs, Poached Eggs, Scrambled Eggs, or Omelets. |
|
| 7 | Elite Gourmet EGC115B Easy Egg Cooker Electric 7-Egg Capacity, Soft, Medium, Hard-Boiled Egg Cooker with Auto Shut-Off, Measuring Cup Included, BPA Free, Classic Black |
|
| 8 | Mojoco Rapid Egg Cooker - Mini Egg Cooker for Steamed, Hard Boiled, Soft Boiled Eggs and Onsen Tamago - Electric Egg Boiler for Home Kitchen, Dorm Use - Smart Egg Maker with Auto Shut OFF and Alarm |
|
| 9 | Elite Gourmet EGC-007## Rapid Egg Cooker, 7 Easy-To-Peel, Hard, Medium, Soft Boiled Eggs, Poacher, Omelet Maker, Auto Shut-Off, Alarm, 16-Recipe Booklet, White |
|
| 10 | Rapid Egg Cooker, 12 Egg Capacity Electric Egg Cooker for Hard Boiled Eggs, Soft, Medium, Poached Eggs, Food & Vegetable Steamer for Breakfast, One-Touch Button, Over-Heat Protect, BPA-Free |
|
This is perhaps the most critical, yet often overlooked, tip. For effortlessly peelable hard-boiled eggs, always opt for eggs that are at least 7-10 days old. These eggs have had enough time for their pH to rise, weakening the bond between the egg white and the inner membrane. If you buy a fresh carton, plan to use them for boiling a week later.
A Pinch of Science: Adding to the Water
While not a universally agreed-upon secret, some home cooks and even experts suggest adding a small amount of baking soda or vinegar to the boiling water. Baking soda is alkaline and can help increase the pH of the water, further aiding in the separation of the shell. Conversely, a splash of vinegar can help prevent shells from cracking during boiling, though its direct impact on peeling ease is debated. A teaspoon of baking soda per quart of water is a common recommendation if you choose to experiment with this method.
The Right Start: Cold vs. Boiling Water
There are two main schools of thought on starting water temperature, each with its advocates:
- Starting with Cold Water: Placing eggs in cold water and then bringing it to a boil gradually minimizes the risk of the shells cracking from a sudden temperature shock. However, some find this method can lead to more difficult-to-peel eggs, as the proteins may set more firmly against the shell.
- Starting with Boiling Water: Many culinary experts swear by adding eggs directly to already boiling water. The rapid heat can help the egg white set quickly, pulling away from the shell membrane and forming a more defined gap. This method also ensures more consistent cooking. If you choose this, use a slotted spoon to gently lower eggs into the boiling water to prevent cracking.
For the easiest peel, especially with store-bought eggs that are a few days old, I personally lean towards starting with already boiling water.
The Boiling Point: Cooking Your Eggs Just Right
The cooking method itself plays a significant role in how easily an egg will peel. Overcooked eggs are more prone to sticking and developing that unappetizing greenish ring around the yolk.
Traditional Pot Method
For stovetop boiling:
- Bring Water to a Rolling Boil: Fill a pot with enough water to fully submerge your eggs. Bring it to a strong, rolling boil.
- Add Eggs Gently: Using a slotted spoon, carefully lower your eggs into the boiling water one by one.
- Cook to Desired Doneness:
- Soft-boiled: 6-7 minutes
- Medium-boiled: 8-9 minutes
- Hard-boiled: 10-12 minutes for a firm, fully cooked yolk. Avoid going much longer than 12 minutes to prevent overcooking.
- Immediate Ice Bath: This is crucial – proceed to the next section immediately after cooking.
Steaming for Success
Steaming is an excellent alternative to boiling, often yielding consistently easy-to-peel eggs. The gentle, even heat helps the egg cook without jostling, and the steam seems to aid in membrane separation.
- Add Water to Pot: Pour about an inch of water into a pot and place a steamer basket inside.
- Bring Water to Boil: Bring the water to a rolling boil over high heat.
- Add Eggs: Gently place eggs in the steamer basket, ensuring they are in a single layer.
- Steam: Cover the pot and steam for 10-12 minutes for hard-boiled.
- Immediate Ice Bath: Transfer to an ice bath right away.
Pressure Cooker/Instant Pot Method
The pressure cooker has become a favorite for many due to its consistent results and remarkably easy-to-peel eggs. The “5-5-5 rule” is a popular technique:
- Place Eggs: Put eggs on a trivet in your Instant Pot with 1 cup of water.
- Cook: Cook on high pressure for 5 minutes.
- Natural Release: Allow a natural pressure release for 5 minutes.
- Ice Bath: Transfer to an ice bath for 5 minutes.
This method produces perfectly cooked hard-boiled eggs that typically peel with incredible ease.
The Egg Cooker Advantage
As someone deeply familiar with egg cookers, I can tell you they are fantastic for consistent, easy-to-peel results. Most egg cookers use a steaming method, often combined with a small piercing tool to prevent cracking. The controlled steam environment helps separate the membrane, leading to smooth peels. Simply follow your specific egg cooker’s instructions for water levels and cooking times to achieve your desired doneness. They often produce the easiest-to-peel eggs without much fuss.
The Ice Bath: Your Most Crucial Step for Effortless Peeling
Regardless of your chosen cooking method, the ice bath is arguably the single most important step for easy peeling. This rapid cooling process serves several vital functions:
- Halts Cooking: Immediately immersing eggs in ice water stops the cooking process, preventing overcooked yolks (and that unsightly green ring).
- Contracts the Egg: The sudden temperature change causes the egg white to contract rapidly, pulling away from the inner membrane.
- Creates Steam: The trapped steam between the shell and the now-contracted egg white helps to further loosen the bond.
Detailed Instructions for Creating and Using an Ice Bath:
- Prepare in Advance: Before your eggs are even done cooking, fill a large bowl with ice and cold water. Ensure there’s plenty of ice.
- Immediate Transfer: As soon as your timer goes off, use a slotted spoon to quickly transfer the hot eggs directly into the ice bath. Do not delay.
- Chill Completely: Let the eggs sit in the ice bath for at least 5-10 minutes, or until they are completely cool to the touch. This full chilling is essential for the membrane separation.
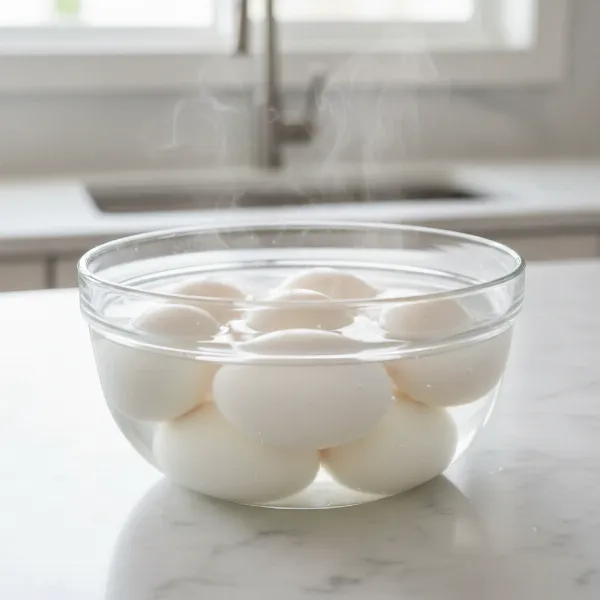 Hard-boiled eggs in an ice bath to stop cooking and aid in easy peeling
Master the Peel: Techniques for a Smooth Finish
Once your eggs are perfectly cooked and chilled, it’s time for the final, satisfying step. Even with all the prep, a good peeling technique can make a difference.
The Gentle Roll
Instead of smashing the egg, which can create large divots, try this:
- Lightly Crack: Tap the wider end of the egg on a hard surface (like a counter or cutting board) to create an initial crack.
- Roll and Micro-Crack: Gently roll the egg between your palms or on the counter, applying even, light pressure. This will create a network of tiny cracks across the shell, making it easier to remove.
Under Running Water or Submerged
This technique is highly recommended by many chefs and food professionals:
- Peel Under Water: Hold the cracked egg under a gentle stream of cold running water, or submerge it in a bowl of water.
- Allow Water to Work: As you start peeling from the large end (where the air pocket is), the water will seep in between the membrane and the egg white. This lubricates the process, helping to lift the shell away and wash away tiny shell fragments.
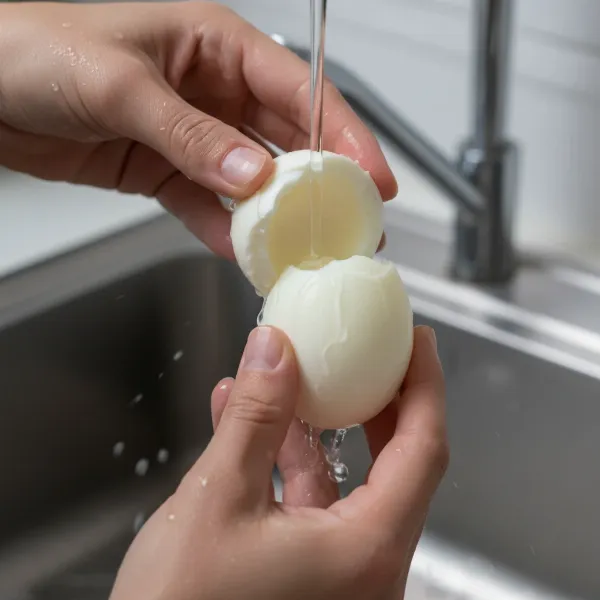 Hands peeling a hard-boiled egg under a gentle stream of cold running water
The “Blow Out” Method (Optional)
This is a fun, albeit less conventional, method:
- Crack Both Ends: Gently tap both the large and small ends of the egg to create a decent-sized opening at each end.
- Blow it Out: Hold the egg with the small hole to your mouth and blow firmly. The egg should pop out of the larger end. This requires a bit of practice and lung power, but it’s certainly impressive when it works!
Start from the Large End
Always begin peeling from the larger end of the egg. This is where the air pocket naturally forms, creating a slight gap between the egg white and the shell membrane, making it the easiest point to start separating the shell.
Troubleshooting Common Peeling Problems
Even with the best techniques, you might occasionally encounter a stubborn egg. Here’s how to address common issues:
- Eggs Still Sticking? The most likely culprits are overly fresh eggs or skipping the immediate ice bath. Ensure your eggs are at least a week old and that they get a full, quick chill in ice water.
- Whites Tearing? This usually indicates the shell isn’t fully separated from the membrane, or you’re peeling too aggressively. Try peeling under running water to help release the shell, and be more gentle with your pressure.
- Green Ring Around Yolk? This is a clear sign of overcooking. The sulfur in the egg white reacts with the iron in the yolk, creating ferrous sulfide. Reduce your cooking time slightly to avoid this.
“The secret to a perfect peel isn’t a single magic trick, but a combination of thoughtful preparation and a swift cold shock after cooking.”
Conclusion
Say goodbye to the frustration of torn egg whites and hello to perfectly peeled hard-boiled eggs, every single time. By understanding the science behind why eggs stick, choosing slightly older eggs, utilizing the crucial ice bath, and employing gentle peeling techniques, you can transform this once-dreaded task into an effortless part of your kitchen routine. Whether you’re making deviled eggs, an egg salad, or simply enjoying a quick protein snack, these methods will ensure your hard-boiled eggs are always ready for their close-up.
What’s your go-to recipe for those beautifully peeled hard-boiled eggs?
Frequently Asked Questions
How long do hard-boiled eggs last in the refrigerator?
Unpeeled hard-boiled eggs can be stored in an airtight container in the refrigerator for up to one week. Once peeled, they should be consumed within 3-4 days to maintain freshness and quality.
Should I peel hard-boiled eggs hot or cold?
It is always best to peel hard-boiled eggs when they are cold, ideally after a thorough ice bath. The rapid cooling helps the membrane separate from the egg white, making the shell much easier to remove cleanly.
Can I use farm-fresh eggs for hard boiling?
While farm-fresh eggs are delicious, they are generally harder to peel due to their lower pH and stronger membrane adhesion. For easier peeling, it’s best to let farm-fresh eggs age in your refrigerator for about 7-10 days before hard boiling.
What is the 5-5-5 method for cooking hard-boiled eggs?
The 5-5-5 method is a popular technique for pressure cooking eggs. It involves cooking eggs on high pressure for 5 minutes, allowing a natural pressure release for 5 minutes, and then transferring them to an ice bath for 5 minutes. This method consistently yields easy-to-peel, perfectly cooked hard-boiled eggs.